


Transforming a lawn into a productive garden bed no longer requires backbreaking digging or expensive machinery. A simple layer of cardboard topped with mulch creates an effective barrier that eliminates grass whilst simultaneously enriching the soil beneath. This method, known as sheet mulching or lasagne gardening, harnesses natural decomposition processes to prepare planting areas with minimal effort and maximum ecological benefit.
Understanding the technique of cardboard under mulch
The science behind smothering grass
The cardboard layer functions as a light-blocking barrier that prevents photosynthesis in the vegetation below. Without sunlight, grass and weeds gradually die off over several weeks. The cardboard itself is biodegradable, breaking down within six to twelve months depending on moisture levels and cardboard thickness. During decomposition, it provides carbon-rich material that feeds soil microorganisms and earthworms, which in turn improve soil structure and fertility.
This approach differs fundamentally from traditional methods that disturb soil ecosystems. By leaving the soil structure intact, beneficial organisms remain undisturbed whilst organic matter accumulates at the surface, mimicking natural forest floor conditions.
Historical context and modern applications
Sheet mulching techniques have been practised in various forms for decades, particularly within permaculture and organic gardening communities. The method gained popularity as gardeners sought sustainable alternatives to chemical herbicides and labour-intensive soil preparation. Today, professional landscapers and home gardeners alike employ this technique for:
- converting lawns into vegetable gardens
- establishing ornamental borders
- creating pathways between existing beds
- suppressing persistent weeds in neglected areas
The versatility of this approach makes it particularly valuable for those looking to expand their growing space without significant financial investment.
The advantages for creating garden beds
Environmental and economic benefits
Using cardboard under mulch presents numerous advantages compared to conventional bed preparation methods. The environmental credentials are particularly impressive, as the technique repurposes waste materials that would otherwise enter landfills. Cardboard boxes from deliveries and packaging provide free resources readily available to most households.
| Method | Labour intensity | Cost | Soil health impact |
|---|---|---|---|
| Cardboard mulching | Low | Minimal | Positive |
| Rotavating | Moderate | High (equipment) | Disruptive |
| Manual digging | Very high | Low | Moderately disruptive |
| Chemical treatment | Low | Moderate | Negative |
Soil improvement and weed suppression
The dual action of weed elimination and soil enrichment sets this method apart. As the cardboard decomposes, it adds organic matter whilst the mulch layer above regulates soil temperature and moisture levels. Earthworms are attracted to the moist environment beneath the cardboard, creating channels that improve drainage and aeration. This biological activity continues long after the initial installation, establishing conditions conducive to plant growth.
Furthermore, the thick mulch layer discourages new weed seeds from germinating, reducing maintenance requirements in subsequent seasons. This ongoing suppression proves particularly valuable in areas previously dominated by aggressive grass species or perennial weeds.
Beyond these practical benefits, understanding proper installation techniques ensures the method delivers its full potential.
Preparing and installing cardboard
Selecting appropriate cardboard
Not all cardboard proves equally suitable for garden use. Plain corrugated cardboard works best, preferably without glossy printing or plastic coating. Removal of tape, staples and sticky labels prevents contamination with non-biodegradable materials. Pizza boxes should be avoided due to grease content, whilst heavily printed cardboard may contain inks with undesirable chemicals.
Acceptable sources include:
- delivery boxes from online purchases
- appliance packaging
- grocery store cartons (with permission)
- office paper waste (shredded as additional layer)
Installation process step by step
Proper installation begins with mowing the existing grass as short as possible. This reduces the volume of dying vegetation and accelerates decomposition. The area should then be thoroughly watered to ensure soil moisture, which aids the breakdown process and helps cardboard conform to ground contours.
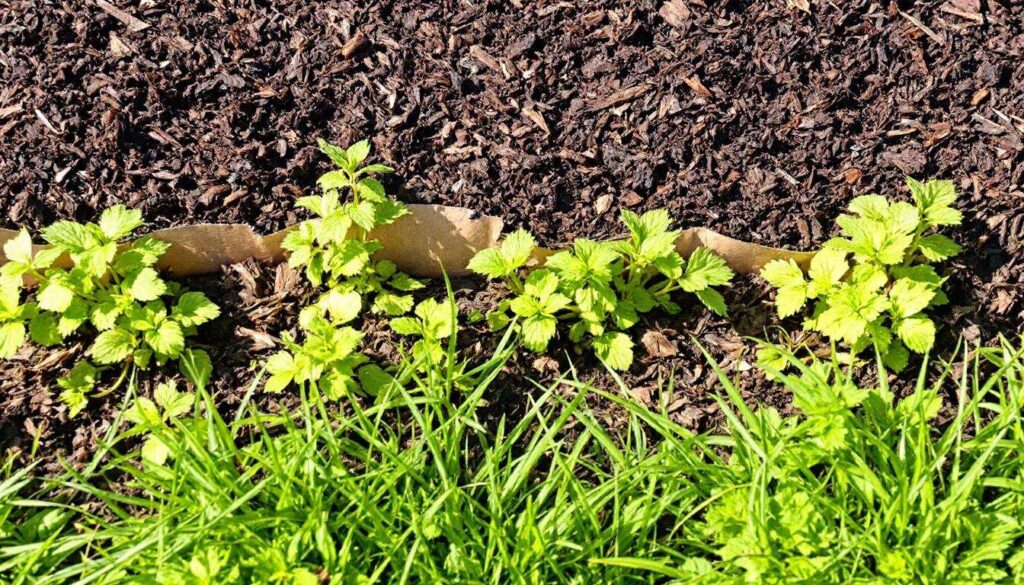
Cardboard sheets are laid directly onto the moist grass, overlapping edges by at least fifteen centimetres to prevent light penetration at joins. For curved beds, smaller pieces allow better coverage of irregular shapes. Once positioned, the cardboard receives another thorough soaking to keep it in place and initiate decomposition.
The final step involves applying mulch immediately, as exposed cardboard can dry out and blow away. This protective layer also improves aesthetics whilst the transformation occurs beneath.
Choosing mulching materials
Organic mulch options
The mulch layer serves multiple functions: anchoring cardboard, retaining moisture, moderating temperature and eventually contributing nutrients as it decomposes. Wood chips remain the most popular choice, offering longevity and attractive appearance. A depth of ten to fifteen centimetres provides adequate coverage without creating anaerobic conditions.
Alternative organic mulches include:
- shredded bark for ornamental areas
- straw or hay for vegetable gardens
- leaf mould for acid-loving plants
- compost as a nutrient-rich top layer
- grass clippings applied in thin layers
Matching mulch to garden purpose
Different garden applications benefit from specific mulch types. Vegetable beds perform well with compost-rich mulches that provide immediate nutrients, whilst ornamental borders suit longer-lasting wood products. Pathways require durable materials like hardwood chips that resist compaction.
Climate considerations also influence selection. In wet regions, coarser materials promote air circulation and prevent fungal issues. Dry climates benefit from finer mulches that reduce evaporation more effectively. Local availability often determines practical choices, with arborist chips frequently available free or at minimal cost.
Even with quality materials and proper installation, certain common errors can undermine results.
Mistakes to avoid for optimal results
Insufficient coverage and timing errors
The most frequent mistake involves inadequate cardboard overlap, leaving gaps where persistent weeds exploit light access. Single layers of thin cardboard may decompose before grass dies completely, particularly with vigorous species. Using multiple layers or thicker cardboard prevents premature breakdown.
Timing also affects success rates. Installing during dry periods without sufficient watering leaves grass dormant rather than dead, allowing recovery when conditions improve. Conversely, creating beds immediately before planting denies adequate time for grass elimination. Most situations require three to six months between installation and planting.
Problematic materials and application depth
Introducing contaminated materials causes long-term problems. Cardboard with plastic windows, synthetic tape residue or toxic inks introduces pollutants into growing areas. Similarly, mulches containing weed seeds, diseased plant material or chemically treated wood compromise bed quality.
Mulch depth requires careful consideration. Insufficient coverage fails to suppress weeds or retain moisture, whilst excessive depth can create waterlogged conditions that suffocate plant roots and encourage pest activity. The following guidelines ensure appropriate application:
- ten to fifteen centimetres for general purposes
- seven to ten centimetres around established plants
- five centimetres maximum against tree trunks and shrub stems
Avoiding these pitfalls sets the stage for successful bed establishment and productive growing seasons ahead.
Expected results and garden maintenance
Timeline for bed readiness
Visible changes begin within weeks as grass yellows and dies beneath the barrier. Complete decomposition of vegetation typically requires three to four months in warm conditions, extending to six months or longer in cooler climates. The cardboard itself breaks down gradually, with most types fully integrated within twelve months.
Planting can commence once grass shows no signs of regrowth when cardboard is lifted at test spots. For immediate planting needs, cutting X-shaped slits through cardboard allows installation of transplants whilst maintaining weed suppression around them. This approach works particularly well for larger specimens like shrubs or widely spaced vegetables.
Ongoing care and bed evolution
Established beds require periodic mulch replenishment as the organic layer decomposes and settles. Annual top-ups of five to seven centimetres maintain weed suppression and continue soil improvement. Observation of mulch depth and condition guides timing, with spring typically ideal for refreshing the layer.
As soil quality improves through continued organic matter addition, plant vigour increases noticeably. Earthworm populations often multiply dramatically, with their castings providing exceptional fertility. The once-compacted lawn soil transforms into friable, dark material rich in beneficial organisms.
This method proves particularly valuable for gardeners seeking sustainable, low-cost solutions to expand growing space. By working with natural processes rather than against them, cardboard mulching creates productive beds whilst minimising environmental impact and physical effort. The technique’s simplicity and effectiveness explain its growing adoption among both novice and experienced gardeners pursuing healthier, more abundant gardens.