


The amaryllis stands as one of the most spectacular flowering bulbs available to gardeners, offering dramatic trumpet-shaped blooms that can transform any indoor space during the winter months. These South American natives have captivated plant enthusiasts for centuries with their bold colours and impressive size, yet many people remain uncertain about the proper care techniques required to achieve those stunning displays. Understanding the complete lifecycle of an amaryllis, from selecting a quality bulb through to encouraging repeat flowering, enables gardeners to enjoy these magnificent plants year after year. With the right approach to planting, watering, and post-bloom maintenance, even novice gardeners can successfully cultivate amaryllis bulbs that produce multiple flower stalks laden with gorgeous blooms.
Choosing the right amaryllis bulb
Identifying a healthy bulb
Selecting a quality amaryllis bulb represents the foundation of successful cultivation. A healthy specimen should feel firm and heavy, indicating good internal structure and adequate food reserves. The outer papery skin may show some minor damage, but the bulb itself should be solid without soft spots, mould, or extensive bruising. Larger bulbs typically produce more flower stalks, with specimens measuring 28-30 centimetres in circumference often yielding two or even three stalks.
When examining potential purchases, gardeners should check for the following characteristics:
- Firm texture throughout the entire bulb
- No signs of rot, mushiness, or unpleasant odours
- Intact basal plate at the bottom where roots emerge
- Green shoots just beginning to emerge from the top
- Minimal damage to the protective outer layers
Varieties and colour options
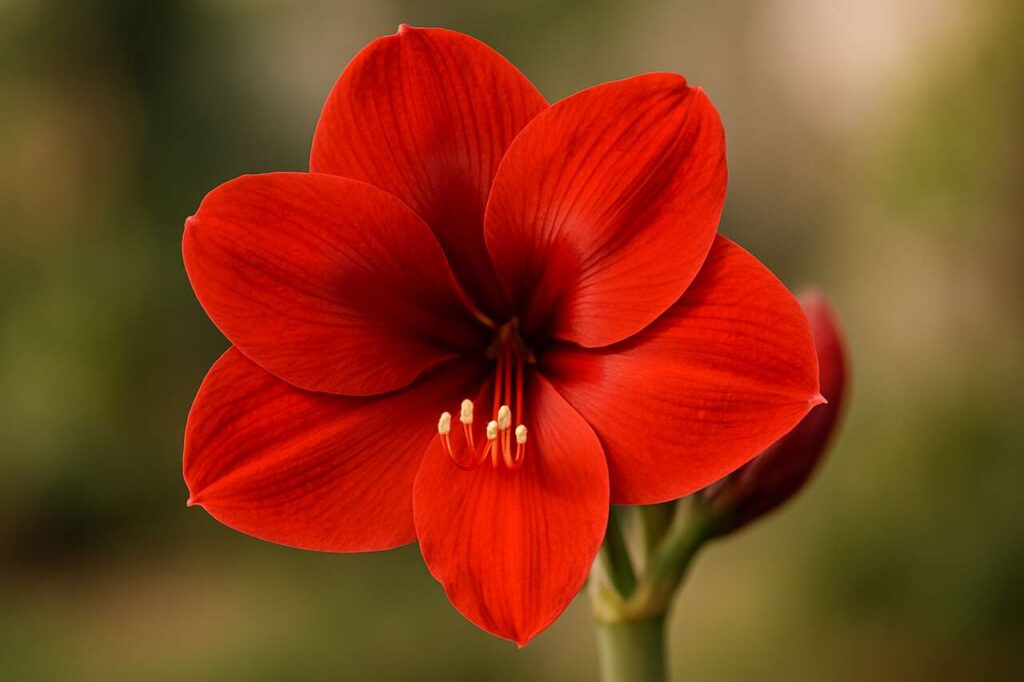
The market offers an extensive range of amaryllis varieties, each with distinct characteristics. Traditional red cultivars remain popular, but modern breeding has introduced striped, double-flowered, and miniature varieties. White varieties like ‘Christmas Gift’ provide elegant simplicity, whilst ‘Apple Blossom’ offers delicate pink-and-white blooms. For those seeking dramatic impact, the deep burgundy ‘Black Pearl’ or the striking red-and-white striped ‘Minerva’ deliver exceptional visual appeal.
Understanding these options helps gardeners make informed decisions about which bulbs will best suit their aesthetic preferences and growing conditions.
Preparing the soil and pot for your amaryllis
Selecting the appropriate container
Container selection significantly influences amaryllis performance. The pot should provide approximately two to three centimetres of space around the bulb’s circumference, as amaryllis actually perform better when slightly pot-bound. A container that is too large encourages excessive root growth at the expense of flowering. Heavy ceramic or terracotta pots offer stability, which becomes important when tall flower stalks develop. Drainage holes are absolutely essential to prevent waterlogging and subsequent bulb rot.
Creating the ideal growing medium
Amaryllis bulbs require a well-draining potting mixture that balances moisture retention with adequate aeration. A combination of quality potting compost, perlite, and coarse sand creates an ideal environment. The mixture should feel light and crumbly rather than dense or compacted.
| Component | Proportion | Purpose |
|---|---|---|
| Potting compost | 60% | Provides nutrients and moisture retention |
| Perlite | 20% | Improves drainage and aeration |
| Coarse sand | 20% | Prevents compaction and enhances drainage |
This carefully balanced medium supports healthy root development whilst preventing the waterlogged conditions that can destroy bulbs.
Planting your amaryllis: essential steps
Proper planting depth and positioning
The planting depth proves crucial for amaryllis success. The bulb should sit with approximately one-third to one-half of its height exposed above the soil surface. This positioning allows the bulb to photosynthesize through its outer layers whilst preventing moisture accumulation around the neck, which could lead to rot. Position the bulb centrally in the pot, ensuring the basal plate rests firmly on the soil surface.
Initial watering and settling
After planting, water the bulb thoroughly but carefully, allowing excess moisture to drain completely. The initial watering settles the soil around the roots and activates growth processes within the bulb. Following this first watering, maintain relatively dry conditions until new growth becomes visible. Overwatering dormant bulbs represents one of the most common mistakes, often resulting in rot before any growth emerges.
Once the planting process is complete and the bulb begins responding to its new environment, attention shifts to the ongoing care requirements that determine flowering success.
Optimising watering and light for healthy growth
Watering schedules throughout the growth cycle
Amaryllis watering requirements change dramatically as the plant develops. During the initial dormant phase, minimal watering prevents rot. Once the flower stalk reaches approximately 10 centimetres in height, gradually increase watering frequency. Throughout active growth, maintain consistently moist but never waterlogged soil. The top two centimetres should dry slightly between waterings.
- Dormant phase: water sparingly, only when soil is completely dry
- Early growth: water moderately every 5-7 days
- Active flowering: water regularly, maintaining consistent moisture
- Post-bloom foliage phase: continue regular watering to support bulb recovery
Light requirements for optimal development
Amaryllis bulbs require bright, indirect light for best results. A south-facing or west-facing windowsill provides ideal conditions in most homes. Insufficient light causes weak, elongated growth and may prevent flowering altogether. Rotating the pot regularly prevents the flower stalk from leaning excessively towards the light source. Temperature also matters, with 18-21°C representing the optimal range for steady growth and flower development.
Understanding these environmental requirements naturally leads to considerations about maintaining the plant once those spectacular blooms have faded.
Caring for the amaryllis after blooming
Removing spent flowers properly
Once the amaryllis flowers fade, prompt removal prevents the plant from directing energy into seed production. Cut the flower stalk approximately five centimetres above the bulb using clean, sharp secateurs. Leave any emerging foliage intact, as these leaves perform the vital function of photosynthesis, rebuilding the bulb’s energy reserves for future flowering.
Foliage maintenance and feeding
The post-bloom foliage phase proves critical for future flowering success. Continue watering regularly and provide bright light to support vigorous leaf growth. Apply a balanced liquid fertiliser every two weeks during this period. The leaves may appear ungainly, but they are actively manufacturing and storing the carbohydrates the bulb needs to produce next year’s flowers. This recovery phase typically lasts several months and requires patience from gardeners eager for immediate results.
This extended care period eventually culminates in the deliberate dormancy phase that prepares the bulb for another flowering cycle.
Storing and making the amaryllis bloom again next year
Inducing dormancy
To encourage repeat blooming, amaryllis bulbs require a dormancy period of 8-10 weeks. In late summer or early autumn, gradually reduce watering until the foliage yellows and dies back naturally. Once the leaves have completely withered, cut them off and move the pot to a cool, dark location with temperatures around 10-13°C. A garage, basement, or unheated spare room often provides suitable conditions.
Repotting and restarting growth
After the dormancy period, examine the bulb for any signs of damage or disease. If the existing potting medium appears depleted or compacted, repot the bulb in fresh compost. Otherwise, simply remove the top layer of old soil and replace it with fresh material. Resume watering sparingly and return the pot to a warm, bright location to initiate new growth.
| Stage | Duration | Key actions |
|---|---|---|
| Active growth and flowering | 6-8 weeks | Regular watering, bright light |
| Foliage recovery | 4-6 months | Continue watering, fertilise fortnightly |
| Dormancy | 8-10 weeks | Stop watering, store in cool darkness |
Successfully cultivating amaryllis bulbs requires attention to detail at each stage of their lifecycle, from initial bulb selection through flowering and into the crucial post-bloom recovery period. The dramatic blooms these plants produce reward the relatively modest care requirements, particularly when gardeners understand the importance of proper watering, adequate light exposure, and the essential dormancy period. By following these guidelines for planting depth, container selection, and seasonal care adjustments, even inexperienced gardeners can enjoy spectacular amaryllis displays year after year, with bulbs often improving their performance as they mature and establish strong root systems.