


Gardening tools endure considerable wear and tear through regular use, and pruning shears are no exception. These essential implements often fall victim to rust and dullness, compromising their effectiveness and potentially damaging plants through ragged cuts. Restoring rusty, blunt pruning shears to their former glory requires neither specialist skills nor expensive equipment. With straightforward techniques and readily available materials, any gardener can breathe new life into neglected tools, ensuring clean cuts that promote plant health whilst extending the lifespan of their equipment.
Understanding the importance of pruning shear maintenance
The impact of poorly maintained tools on plant health
Dull or rusty pruning shears create jagged wounds on plant stems rather than clean cuts. These ragged edges provide entry points for pathogens, increasing the risk of disease and infection. Plants struggle to heal from uneven cuts, diverting energy away from growth and flowering. Professional horticulturists consistently emphasise that sharp, clean tools are fundamental to successful pruning practices.
Economic and practical benefits of tool maintenance
Regular maintenance extends the functional lifespan of pruning shears considerably. Quality secateurs represent a significant investment, and proper care ensures they remain effective for years. Consider these advantages:
- Reduced replacement costs through prolonged tool life
- Improved cutting efficiency requiring less physical effort
- Enhanced safety through predictable, controlled cutting action
- Maintained resale value for premium brands
Beyond financial considerations, well-maintained shears make pruning tasks more enjoyable. Sharp blades glide through stems effortlessly, reducing hand fatigue during extended pruning sessions and enabling more precise work.
Recognising these benefits naturally leads to the question of how to evaluate the current state of your tools and determine what restoration work they require.
Assessing the condition of rusty pruning shears
Identifying different types of rust damage
Not all rust presents the same challenge. Surface rust appears as a light orange discolouration that hasn’t penetrated deeply into the metal. This type responds well to simple cleaning methods. Moderate rust shows as darker patches with slight pitting, whilst severe rust creates deep corrosion that may compromise structural integrity.
| Rust Severity | Visual Indicators | Restoration Difficulty |
|---|---|---|
| Light | Orange film, no pitting | Easy |
| Moderate | Dark patches, shallow pits | Moderate |
| Severe | Deep corrosion, flaking metal | Challenging |
Checking mechanical functionality
Beyond rust assessment, examine the mechanical components thoroughly. Test the spring mechanism for responsiveness and check whether the pivot bolt moves smoothly. Inspect the blade alignment by closing the shears and holding them up to light; properly aligned blades should meet without gaps. If the handles wobble excessively or the locking mechanism fails, these issues require attention alongside rust removal.
Once you’ve thoroughly assessed the damage, you can proceed with appropriate cleaning techniques tailored to your shears’ condition.
Cleaning pruning shears effectively
Initial cleaning to remove dirt and sap
Begin by addressing surface contamination before tackling rust. Plant sap, soil, and organic residue often mask the true extent of corrosion. Use warm, soapy water and a stiff brush to scrub all surfaces thoroughly. For stubborn sap deposits, white spirit or methylated spirits work effectively. Pay particular attention to the pivot area where debris accumulates.
Disassembly for thorough cleaning
For comprehensive restoration, disassemble the shears completely. Most models feature a single pivot bolt that can be removed with appropriate tools:
- Photograph the assembly before disassembly for reference
- Use the correct size screwdriver or spanner to avoid damaging fasteners
- Keep small components in a container to prevent loss
- Clean each part individually for maximum effectiveness
Disassembly allows access to hidden rust in crevices and enables proper lubrication of moving parts during reassembly. This thorough approach yields superior results compared to surface-only cleaning.
With the shears clean and disassembled, attention can turn to the specific challenge of eliminating rust from the metal surfaces.
Methods to remove rust
Chemical rust removal techniques
Several chemical solutions effectively dissolve rust without excessive scrubbing. White vinegar, containing acetic acid, proves remarkably effective for light to moderate rust. Submerge affected parts in vinegar for several hours or overnight, then scrub with fine wire wool. Commercial rust removers work faster but require careful handling and adequate ventilation.
Mechanical rust removal approaches
For stubborn rust, mechanical methods provide more aggressive action. Fine-grit sandpaper (220-400 grit) removes surface rust whilst minimising scratching. Wire brushes tackle heavier corrosion, though brass brushes prove gentler on metal than steel versions. Steel wool in various grades offers versatility:
- Coarse grade (0 or 1) for heavy rust
- Medium grade (00) for moderate corrosion
- Fine grade (000 or 0000) for polishing and light rust
Natural rust removal alternatives
Environmentally conscious gardeners appreciate natural methods. Lemon juice combined with salt creates a mildly abrasive paste that dissolves rust through citric acid action. Baking soda mixed with water forms another effective paste. These gentler approaches require more time and effort but avoid harsh chemicals.
Once rust has been successfully removed and the metal surfaces restored, the focus shifts to restoring the cutting edge to optimal sharpness.
Sharpening your pruning shears for precise cutting
Selecting appropriate sharpening tools
Different sharpening implements suit various skill levels and shear conditions. Diamond-coated files offer durability and aggressive cutting action for very dull blades. Traditional sharpening stones provide excellent control but require technique. Dedicated pruner sharpeners with pre-set angles simplify the process for beginners.
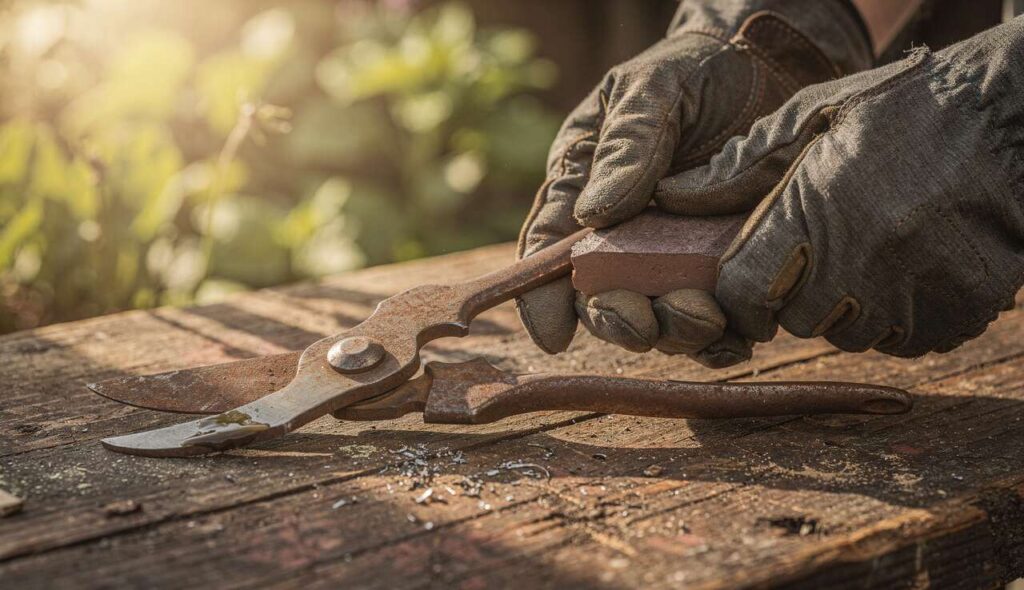
The sharpening technique
Proper technique ensures effective sharpening without damaging the blade. Pruning shears typically feature a bevelled edge on one side only. Follow these steps:
- Secure the blade firmly to prevent movement
- Identify the existing bevel angle (typically 20-30 degrees)
- Stroke the file or stone along the bevelled edge only
- Maintain consistent angle throughout each stroke
- Work from base to tip in smooth, even movements
- Remove any burr from the flat side with light strokes
Test sharpness by cutting paper or thin cardboard. A properly sharpened blade slices cleanly without tearing. Avoid over-sharpening, which removes excessive metal and shortens blade life.
Having restored your shears to full functionality, implementing preventive measures ensures they remain in excellent condition for seasons to come.
Preventing future rust and maintenance tips
Post-use cleaning routine
Establishing a consistent cleaning habit prevents rust formation. After each pruning session, wipe blades with a damp cloth to remove sap and debris, then dry thoroughly. This simple routine takes mere seconds but dramatically reduces corrosion risk. For intensive use, clean more thoroughly with soapy water before drying.
Protective treatments and storage
Applying protective coatings creates a barrier against moisture. Light machine oil, camellia oil, or specialist tool protectants all work effectively. Apply a thin film to all metal surfaces, including springs and pivot points. Proper storage proves equally important:
- Store in dry locations away from ground moisture
- Hang tools rather than laying them on damp surfaces
- Use tool rolls or cases for additional protection
- Keep blades closed when stored to maintain spring tension
Regular maintenance schedule
Implementing a maintenance calendar prevents neglect. Light oiling after every few uses maintains smooth operation, whilst thorough cleaning and sharpening once or twice per season keeps blades performing optimally. Spring and autumn represent ideal times for comprehensive maintenance, coinciding with major pruning periods.
Restoring rusty, dull pruning shears transforms frustrating gardening experiences into efficient, satisfying work. Through systematic cleaning, rust removal, and sharpening, followed by diligent preventive care, these essential tools deliver years of reliable service. The modest time investment in maintenance yields substantial returns through improved plant health, reduced physical strain, and extended tool longevity. Every gardener possesses the capability to maintain professional-quality cutting tools with basic materials and straightforward techniques.