


Composting remains one of the most effective ways to reduce household waste whilst enriching garden soil with valuable nutrients. Yet many homeowners shy away from this sustainable practice due to concerns about the visual impact of traditional compost bins. These bulky, often unattractive containers can detract from carefully planned garden aesthetics, creating an eyesore that clashes with ornamental planting schemes. A clever DIY solution using reclaimed materials offers a practical alternative that combines functionality with visual appeal, transforming composting from a necessary evil into an attractive garden feature.
Introduction to aesthetic composting
The challenge of traditional compost systems
Conventional compost bins typically prioritise function over form, resulting in structures that gardeners often hide away in remote corners. Plastic tumblers, wire mesh enclosures, and basic wooden boxes serve their purpose but rarely complement garden design. This aesthetic disconnect has prevented many environmentally conscious gardeners from embracing composting, despite understanding its ecological benefits. The visual disruption becomes particularly problematic in smaller urban gardens where every element remains visible and contributes to the overall atmosphere.
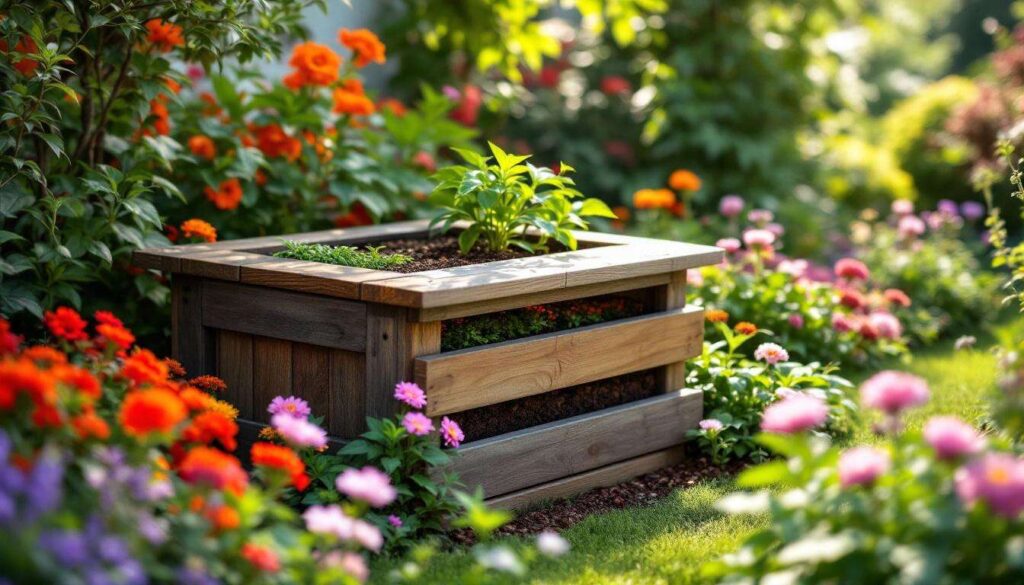
Reimagining compost as a design element
Modern gardening philosophy increasingly recognises that sustainable practices need not compromise visual appeal. By approaching compost systems as intentional design features rather than utilitarian necessities, gardeners can create structures that enhance rather than detract from their outdoor spaces. This shift in perspective opens possibilities for integrating composting into formal garden layouts, cottage garden schemes, and contemporary minimalist designs alike.
The key lies in selecting materials and construction methods that align with existing garden aesthetics whilst maintaining the practical requirements for successful decomposition.
Benefits of a DIY solution
Cost efficiency and resourcefulness
Building a custom compost bin using reclaimed materials offers significant financial advantages over purchasing ready-made alternatives. The materials required often cost little to nothing, particularly when sourcing discarded pallets from local businesses or industrial sites. This approach embodies the core principles of sustainable living by:
- Diverting waste materials from landfill disposal
- Eliminating the environmental cost of manufacturing new products
- Reducing transportation emissions associated with commercial purchases
- Creating a circular economy within your own property
Customisation possibilities
Unlike standardised commercial options, DIY construction allows complete customisation to suit specific requirements. Gardeners can adjust dimensions to fit available space, create multiple compartments for different composting stages, and modify ventilation features according to climate conditions. The aesthetic treatment remains entirely flexible, from natural weathered wood finishes to painted surfaces matching garden furniture or architectural elements.
Educational and practical value
Constructing a compost system provides valuable hands-on experience with basic carpentry whilst deepening understanding of decomposition processes. The three-section design facilitates proper compost management, allowing fresh materials to age progressively through distinct stages before reaching usable maturity. This systematic approach produces higher quality compost whilst maintaining tidier operations compared to single-bin systems.
These combined advantages make DIY construction an appealing option for gardeners seeking both practical functionality and visual harmony.
Materials needed for a sleek composter
Essential components
The foundation of this project requires wooden pallets as the primary structural material. Standard pallet dimensions work well for most applications, though larger or smaller options can accommodate specific spatial requirements. Beyond the pallets themselves, several additional items prove necessary:
| Material | Quantity | Purpose |
|---|---|---|
| Wooden pallets | 9-12 | Main structure walls and dividers |
| Wood screws | 100-150 | Securing joints and connections |
| L-brackets | 12-16 | Reinforcing corner stability |
| Exterior wood treatment | 2-3 litres | Weather protection and aesthetics |
| Wire mesh | 2-3 metres | Base layer for drainage and pest prevention |
Safety considerations for pallet selection
Not all pallets suit garden applications due to chemical treatments applied during manufacturing. The IPPC stamp provides crucial information about treatment methods. Acceptable pallets display HT markings, indicating heat treatment that poses no risk to plants or soil organisms. Conversely, pallets marked with MB have undergone methyl bromide fumigation, a toxic process that renders them unsuitable for organic gardening applications. Always inspect pallets carefully before acquisition, rejecting any with questionable markings or visible contamination from industrial use.
Optional enhancement materials
Additional materials can elevate both functionality and appearance. Hinges and latches enable removable front panels for easier access to finished compost. Exterior-grade stain or paint protects wood whilst allowing colour coordination with existing garden features. Roofing felt or corrugated plastic sheeting creates weather protection whilst maintaining airflow.
With materials gathered and safety verified, the construction process can commence following a systematic approach.
Steps to build a design compost bin
Foundation preparation
Begin by selecting an appropriate location that balances practical accessibility with visual integration. The site should offer level ground, partial shade to moderate decomposition rates, and convenient access from both kitchen and garden areas. Clear vegetation and level the surface, then lay wire mesh to prevent rodent intrusion whilst allowing beneficial organisms to enter from below.
Assembly sequence
Construct the three-compartment system by positioning pallets vertically to form walls. The first section receives fresh organic waste, the middle compartment houses actively decomposing material, and the final bay stores finished compost ready for garden application. Secure pallets together using wood screws and L-brackets at each junction point, ensuring structural rigidity. Create removable front panels by attaching pallets with hinges, facilitating easy access for turning compost and harvesting finished material.
Finishing touches
Sand rough edges to prevent splinters during use. Apply chosen wood treatment according to manufacturer instructions, allowing adequate drying time before introducing organic materials. Consider adding identification labels to each compartment, helping household members understand the progression system and maintain proper usage.
Proper ongoing maintenance ensures this attractive system continues functioning effectively whilst remaining visually appealing.
Maintenance and tips for odourless compost
Balancing carbon and nitrogen
Successful composting requires maintaining appropriate ratios between carbon-rich brown materials and nitrogen-rich green waste. Aim for approximately three parts brown materials to one part green waste by volume. This balance prevents the anaerobic conditions that generate unpleasant odours whilst promoting efficient decomposition.
- Brown materials: dried leaves, cardboard, paper, wood chips, straw
- Green materials: vegetable scraps, grass clippings, coffee grounds, fresh plant trimmings
Moisture management
Compost consistency should resemble a wrung-out sponge, damp but not waterlogged. Excessive moisture creates anaerobic conditions and foul smells, whilst insufficient water halts decomposition. During dry periods, lightly water the pile. In wet weather, add extra brown materials to absorb excess moisture and maintain proper balance.
Aeration practices
Regular turning introduces oxygen essential for aerobic decomposition. Use a garden fork to redistribute materials from outer edges to the centre every two to three weeks. This practice accelerates breakdown, maintains even moisture distribution, and prevents odour development by ensuring adequate airflow throughout the pile.
Structural upkeep
Inspect wooden components annually for signs of deterioration. Reapply protective treatments as needed, typically every two to three years depending on climate exposure. Tighten any loosened screws and replace damaged sections promptly to maintain structural integrity and visual appeal.
Beyond functional maintenance, thoughtful integration transforms the compost system into a cohesive garden element.
Harmonious integration into your garden
Strategic placement principles
Position the compost system where it serves practical needs whilst complementing visual flow. Consider locating it near vegetable gardens or borders requiring regular soil amendment, reducing transport distances for finished compost. Screen the structure partially with climbing plants or ornamental shrubs if desired, though well-executed designs often merit prominent placement as attractive features in their own right.
Aesthetic enhancement techniques
Paint or stain the wooden structure in colours harmonising with existing garden elements. Natural wood tones suit cottage gardens and rustic schemes, whilst painted finishes work well in contemporary settings. Add decorative details such as carved labels, stencilled designs, or coordinating hardware that elevates the structure beyond purely functional status. Surrounding the base with paving stones or gravel creates a tidy threshold whilst facilitating access during wet conditions.
Companion planting opportunities
Utilise the vertical surfaces and surrounding ground for productive planting. Train climbing vegetables like beans or squash along the sides, creating living screens that enhance productivity whilst softening structural lines. Plant herbs or flowers around the perimeter, attracting beneficial insects whilst contributing to overall garden beauty.
Transforming compost bins from eyesores into attractive garden features requires only modest investment in materials and effort. This DIY approach delivers environmental benefits through waste reduction and soil improvement whilst maintaining visual harmony within carefully planned garden spaces. The three-compartment system optimises composting efficiency, producing high-quality soil amendment that closes the nutrient cycle within your property. By selecting safe materials, following systematic construction methods, and maintaining proper composting practices, gardeners create functional structures that enhance rather than detract from outdoor aesthetics. This solution proves that sustainable practices need not compromise design principles, offering an accessible pathway for more gardeners to embrace composting without sacrificing the visual appeal of their cherished outdoor spaces.