
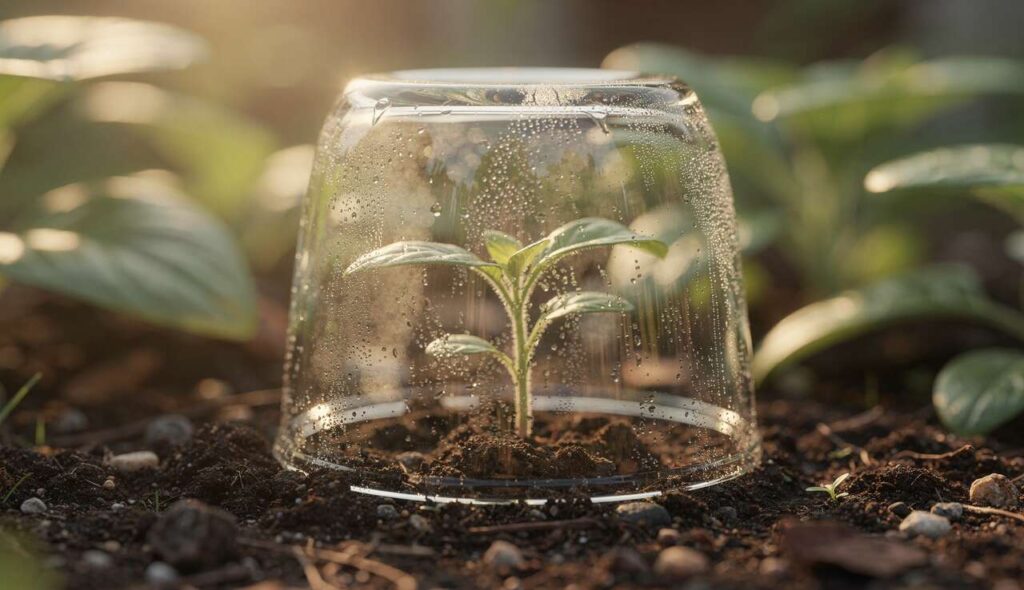
Gardeners have long relied on simple yet effective techniques to protect vulnerable seedlings from harsh conditions. The jar-over-plant method stands as one of the most accessible approaches to nurturing young plants during their critical early stages. By placing a transparent jar over individual seedlings, growers create a controlled microenvironment that shields delicate shoots from temperature fluctuations, wind damage, and pest interference. This time-tested practice transforms ordinary glass containers into functional mini greenhouses, offering protection without requiring expensive equipment or complex installation procedures.
Understanding the mini greenhouse principle
The science behind enclosed growing environments
The jar-over-plant technique operates on the same fundamental principles that govern commercial greenhouse structures. When a transparent container covers a seedling, it creates a sealed environment where heat and moisture become trapped. Sunlight penetrates the glass, warming the air and soil beneath, whilst the barrier prevents this accumulated warmth from escaping rapidly. This phenomenon, known as the greenhouse effect, maintains consistently higher temperatures around the plant compared to the surrounding garden.
The enclosed space also regulates humidity levels by capturing water vapour released through transpiration and evaporation. This moisture condenses on the interior glass surface and returns to the soil, creating a self-sustaining water cycle that reduces the frequency of manual watering. The combination of stable temperature and humidity provides seedlings with ideal conditions for photosynthesis and cellular development.
Historical context of protective plant coverings
Protective coverings for plants have existed for centuries across various cultures. Gardeners have employed materials ranging from straw cloches to oiled paper frames, all serving the same purpose: extending the growing season and safeguarding tender plants. The glass jar method represents a modern adaptation of these traditional practices, utilising readily available household items to achieve professional results. Its simplicity and effectiveness have made it particularly popular amongst home gardeners and allotment holders.
This foundational understanding of how enclosed environments benefit plants naturally leads to examining the specific temperature-related advantages that make this technique so valuable.
The thermal benefits of the jar over the plant
Temperature regulation during cold periods
Young seedlings demonstrate extreme sensitivity to temperature variations, particularly during spring when night-time frosts remain a genuine threat. A glass jar provides crucial insulation that can elevate the temperature around the plant by several degrees. Research indicates that even a modest temperature increase of 3-5 degrees Celsius can significantly impact seedling survival rates during cold snaps.
| Condition | Outside temperature | Under jar temperature | Temperature difference |
|---|---|---|---|
| Clear night | 2°C | 6°C | +4°C |
| Cloudy day | 8°C | 11°C | +3°C |
| Sunny morning | 10°C | 16°C | +6°C |
Protection from wind chill and frost damage
Beyond absolute temperature, the jar eliminates wind chill effects that can desiccate and damage tender foliage. Wind accelerates moisture loss from leaf surfaces and can cause physical damage to fragile stems. The solid barrier of glass completely blocks air movement whilst still allowing light transmission. During frosty conditions, the jar prevents direct contact between ice crystals and plant tissues, which often proves fatal to seedlings. The thermal mass of the jar itself absorbs heat during daylight hours and releases it gradually overnight, further moderating temperature extremes.
Managing heat accumulation safely
Whilst warmth benefits seedlings, excessive heat poses risks. On particularly sunny days, temperatures beneath an unventilated jar can rise to damaging levels. Gardeners must monitor conditions and provide adequate ventilation by either removing the jar during peak heat hours or propping it slightly open. This balance between protection and ventilation requires attention but becomes intuitive with experience.
The thermal advantages directly contribute to enhanced growth rates, which merit closer examination.
Improving seedling growth
Accelerated germination and establishment
The stable, warm environment beneath a jar accelerates metabolic processes essential for seedling development. Seeds germinate more rapidly when soil temperatures remain consistently warm, and emerging seedlings establish root systems more quickly. This head start proves invaluable in regions with short growing seasons, effectively extending the productive period by several weeks. Plants that establish earlier often develop stronger root systems, making them more resilient throughout their lifecycle.
Enhanced photosynthesis and nutrient uptake
Optimal temperature ranges enable seedlings to photosynthesise more efficiently. The controlled microclimate ensures that plants operate within their preferred temperature range for longer periods each day. Additionally, warmer soil temperatures promote beneficial microbial activity, which enhances nutrient availability and uptake. The improved humidity levels prevent water stress, allowing plants to maintain open stomata for gas exchange without excessive moisture loss.
Measurable growth improvements
Gardeners consistently report noticeable differences between protected and unprotected seedlings:
- Increased stem thickness and structural strength
- Faster leaf development with deeper green colouration
- Earlier flowering and fruit production
- Higher survival rates during transplanting
- More vigorous overall growth patterns
These growth benefits work in tandem with the method’s protective qualities against various threats to seedling health.
Preventing diseases and pests
Physical barrier against common pests
The jar creates an impenetrable shield against numerous garden pests that target vulnerable seedlings. Slugs and snails, which devastate young plants overnight, cannot penetrate the glass barrier. Flying insects such as aphids, whiteflies, and flea beetles find themselves excluded from their preferred feeding sites. Birds that might uproot seedlings whilst foraging or use tender shoots for nesting material cannot access protected plants. This physical protection eliminates the need for chemical interventions during the most vulnerable growth phase.
Disease prevention through environmental control
Whilst the jar method provides excellent pest protection, it requires careful management to prevent fungal diseases. The humid environment that benefits growth can also encourage damping-off and other moisture-related ailments if ventilation proves inadequate. Successful disease prevention involves:
- Ensuring jars remain clean and free from algae buildup
- Providing daily ventilation during warm weather
- Avoiding overwatering the enclosed soil
- Removing condensation that obscures light transmission
- Monitoring plants regularly for early disease signs
Reducing chemical intervention needs
By eliminating pest access during the critical establishment period, the jar method significantly reduces or eliminates the need for pesticides. This approach aligns with organic gardening principles and promotes healthier soil ecosystems. Young plants protected from early pest damage often develop sufficient vigour to withstand later pest pressure without intervention.
Maximising these protective benefits requires selecting appropriate containers for the task.
Choosing the right jar for the method
Size considerations for different plants
Jar selection depends primarily on the mature size of the seedling during its protected phase. Small seedlings such as lettuce or herbs thrive under standard preserving jars, whilst larger vegetables like courgettes require more substantial containers. The jar must provide adequate headroom to prevent foliage from touching the glass, which can cause scorching or frost damage. As a general guideline, the container should offer at least 5-8 centimetres of clearance above the seedling’s expected height during the protection period.
| Plant type | Recommended jar size | Protection duration |
|---|---|---|
| Lettuce, radish | 500ml-1L jar | 2-3 weeks |
| Tomato, pepper | 2-3L jar | 3-4 weeks |
| Courgette, cucumber | Large bell cloche | 2-3 weeks |
Material properties and light transmission
Clear glass provides optimal light transmission whilst maintaining durability and weather resistance. Coloured or tinted glass reduces available light and should be avoided. Plastic containers offer a lightweight alternative but may degrade under UV exposure and often provide inferior insulation. Glass thickness affects both insulation properties and breakage risk; standard preserving jars offer an excellent balance. The container must be thoroughly cleaned before use to maximise light penetration and prevent disease transmission between seasons.
Ventilation and access features
Whilst solid jars work effectively, containers with removable lids or adjustable openings provide superior temperature control. Some gardeners drill small holes in jar lids to provide constant gentle ventilation. Others prefer completely open-topped jars that can be covered with mesh during pest-heavy periods. The chosen system should allow quick access for watering and inspection without disturbing the seedling.
With appropriate containers selected, proper installation ensures maximum benefit from the technique.
Steps to install the jar-over-plant technique
Preparing the planting site
Success begins with proper site preparation before jar placement. The soil should be well-cultivated, free from large debris, and level to ensure the jar sits flush with the ground. Creating a shallow depression around the planting area allows the jar rim to nestle into the soil, preventing wind from dislodging it and improving the seal against pests. The planting site must receive adequate sunlight throughout the day, as the jar cannot compensate for insufficient light conditions.
Planting and initial jar placement
The installation process follows these systematic steps:
- Sow seeds or transplant seedlings according to standard depth and spacing requirements
- Water the soil thoroughly before jar placement to establish initial moisture levels
- Gently lower the jar over the seedling, ensuring no foliage becomes trapped or damaged
- Press the jar rim approximately 1-2 centimetres into the soil to create a stable seal
- Bank additional soil around the exterior base to anchor the jar against wind
- Label the jar exterior with plant variety and planting date using waterproof markers
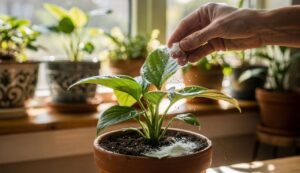
Ongoing maintenance and monitoring
Regular attention ensures the protected environment remains beneficial rather than harmful. Daily inspection during morning hours allows assessment of condensation levels and temperature buildup. Excessive condensation indicates insufficient ventilation, whilst completely dry glass suggests inadequate moisture. Watering requirements typically decrease under jar protection, but soil moisture should be checked weekly by gently lifting the jar edge. Remove the jar entirely once seedlings outgrow the space or when outdoor temperatures stabilise above the minimum threshold for that particular plant species.
Gradual acclimatisation before removal
Abrupt jar removal can shock seedlings accustomed to protected conditions. A hardening-off period of 5-7 days prepares plants for exposure. Begin by removing jars for increasing periods during mild daytime hours, replacing them overnight. Gradually extend exposure time until plants remain uncovered for full days, then remove jars permanently. This measured approach prevents transplant shock and ensures seedlings transition successfully to unprotected growth.
The jar-over-plant method delivers substantial benefits through minimal investment and effort. By creating stable microclimates that regulate temperature and humidity whilst excluding pests, simple glass containers transform into effective growing aids. The technique accelerates germination, promotes vigorous early growth, and protects vulnerable seedlings during their most critical developmental phase. Successful implementation requires appropriate jar selection, proper installation, and attentive monitoring, but these modest requirements yield impressive results. Gardeners seeking to extend growing seasons, improve seedling survival rates, and reduce chemical interventions will find this traditional approach remains remarkably relevant for contemporary cultivation challenges.