


Calatheas have captured the hearts of plant enthusiasts across the country with their striking foliage and intriguing behaviour. These tropical beauties, native to the rainforests of South America, display leaves adorned with intricate patterns that fold upwards at dusk, earning them the affectionate nickname of prayer plants. Whilst their reputation as demanding houseplants may intimidate novice gardeners, understanding their natural habitat requirements makes cultivation considerably more straightforward. The secret to success lies predominantly in selecting the correct location within your home, where light, humidity, and temperature conditions mirror their native environment.
The best light conditions for your calathea
Understanding indirect light requirements
Calatheas thrive in bright indirect light, which replicates the dappled sunlight filtering through the rainforest canopy. Direct sunlight proves detrimental to these delicate plants, causing leaf scorch, faded patterns, and crispy brown edges that diminish their ornamental appeal. The ideal positioning involves placing your calathea near a window where sunlight enters but does not directly strike the foliage throughout the day.
Optimal window orientations
North-facing and east-facing windows provide the most suitable lighting conditions for calatheas in UK homes. These orientations deliver approximately six to eight hours of gentle, filtered light daily without the intensity that causes damage. An east-facing window offers mild morning sun that energises the plant without overwhelming it, whilst north-facing windows provide consistent, soft illumination throughout the day. If your only option involves south or west-facing windows, position the plant several feet back from the glass or use sheer curtains to diffuse the stronger afternoon rays.
Signs of incorrect light exposure
Monitoring your calathea’s response to its placement helps ensure optimal conditions. Common indicators of lighting issues include:
- Faded or bleached leaf patterns suggesting excessive light exposure
- Brown, crispy leaf edges indicating sunburn from direct rays
- Leggy growth with elongated stems pointing towards insufficient light
- Loss of vibrant colouration when light levels prove inadequate
- Slowed growth during active growing seasons due to poor illumination
Adjusting placement based on these visual cues allows you to fine-tune the environment. Beyond lighting considerations, humidity plays an equally crucial role in calathea health, making certain rooms particularly advantageous.
Placing a calathea in a bathroom: an expert tip
Why bathrooms suit calatheas perfectly
Bathrooms represent exceptional locations for calatheas due to naturally elevated humidity levels. These tropical plants evolved in environments where moisture saturates the air, and bathrooms replicate this condition through regular showering and bathing activities. The steam generated during hot showers creates a microclimate that keeps leaf tissues hydrated, preventing the browning and curling that occurs in drier environments.
Essential bathroom requirements
Not every bathroom suits calathea cultivation equally well. The space must feature a window providing adequate natural light, as artificial bathroom lighting rarely suffices for photosynthesis. Additionally, ensure the room maintains moderate temperatures without dramatic fluctuations. Bathrooms with underfloor heating or radiators that create excessive warmth may dry the air despite moisture from water use, potentially negating the humidity advantage.
Positioning within the bathroom
Strategic placement maximises the benefits whilst avoiding potential pitfalls. Position your calathea on a shelf, windowsill, or plant stand where it receives indirect light from the window but remains protected from direct water spray during showers. Excessive water droplets on leaves can lead to fungal issues or water spots. Maintain distance from radiators or heated towel rails that emit drying heat, and ensure adequate air circulation to prevent stagnant, overly humid conditions that encourage mould growth.
For those without suitable bathroom spaces, another household room offers comparable advantages for calathea cultivation.
The kitchen: an ideal place for a calathea
Kitchen humidity advantages
Kitchens naturally generate elevated humidity levels through cooking activities, particularly boiling water, steaming vegetables, and using kettles. This regular moisture release into the air creates conditions favourable for calatheas without requiring additional humidification equipment. The ambient humidity typically remains higher than in living rooms or bedrooms, though not quite matching bathroom levels.
Light conditions in kitchen spaces
Many kitchens feature windows that provide suitable indirect light for calatheas. Positioning your plant near a kitchen window, away from the direct sightline of intense afternoon sun, offers excellent growing conditions. The combination of natural humidity from cooking and appropriate lighting makes kitchens particularly accommodating. However, avoid placing plants directly beside cookers or ovens where temperature fluctuations and potential grease splatter could cause problems.
Practical considerations for kitchen placement
When situating a calathea in your kitchen, consider these practical factors:
- Distance from cooking surfaces to avoid heat damage and grease accumulation
- Accessibility for regular watering without disrupting food preparation areas
- Protection from accidental knocks during busy cooking periods
- Adequate counter or shelf space that receives appropriate light
- Ventilation that provides fresh air without creating cold draughts
Regardless of whether you choose a bathroom or kitchen location, maintaining proper humidity levels remains paramount for calathea success.
Ensuring the perfect humidity for your calathea
Ideal humidity ranges
Calatheas flourish when humidity levels remain between 50% and 60%, though they tolerate ranges from 40% to 70%. UK homes typically maintain humidity around 30% to 40% during winter months when central heating operates, creating challenging conditions for these tropical specimens. Monitoring humidity with a hygrometer helps you understand whether additional measures prove necessary.
Methods for increasing humidity
Several effective techniques raise humidity around your calathea:
- Grouping multiple plants together creates a humid microclimate through collective transpiration
- Placing the pot on a pebble tray filled with water provides evaporative moisture
- Using a room humidifier maintains consistent humidity levels automatically
- Occasional misting offers temporary relief, though frequent misting may encourage fungal problems
- Positioning away from heating vents and radiators prevents excessive drying
Avoiding common humidity mistakes
Whilst humidity proves essential, excessive moisture combined with poor air circulation creates fungal and bacterial issues. Never allow water to pool on leaves overnight, as this encourages disease. Similarly, avoid placing calatheas in enclosed terrariums or excessively confined spaces where air stagnates. Balance remains key: provide adequate humidity whilst ensuring sufficient airflow prevents pathogen development.
Beyond environmental factors, daily care routines significantly impact your calathea’s overall health and appearance.
Caring for your calathea daily
Watering requirements and techniques
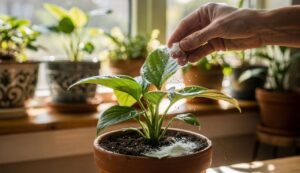
Calatheas require consistently moist soil without waterlogging, presenting a delicate balance. Check the top two centimetres of soil regularly, watering when this layer feels dry to the touch. Use room-temperature water, as cold water shocks the sensitive root system and may cause leaf damage. Filtered or rainwater proves preferable to tap water, which often contains minerals and fluoride that accumulate in soil and cause leaf tip browning.
Leaf maintenance practices
Regular leaf cleaning maintains both aesthetics and plant health. Dust accumulation blocks stomata, reducing the plant’s ability to photosynthesise and transpire effectively. Gently wipe leaves with a damp, soft cloth every fortnight, supporting each leaf from beneath to prevent damage. This practice also allows you to inspect for pest infestations such as spider mites or thrips, which calatheas occasionally attract.
Fertilisation schedule
During the growing season from spring through summer, feed your calathea monthly with a diluted liquid houseplant fertiliser at half the recommended strength. These plants prove sensitive to fertiliser salts, making less truly more in this instance. Cease feeding during autumn and winter when growth naturally slows. Over-fertilisation manifests as brown leaf tips and edges, mimicking other stress symptoms.
Temperature management
Maintain temperatures between 18°C and 24°C for optimal growth. Calatheas tolerate brief temperature drops but suffer damage below 15°C. Avoid positioning near draughty windows, exterior doors, or air conditioning units that create temperature fluctuations. Consistent warmth combined with proper humidity and lighting creates the foundation for thriving plants.
For enthusiasts wishing to expand their collection, understanding propagation techniques proves invaluable.
Calathea propagation methods
Division: the primary propagation technique
Division represents the most reliable propagation method for calatheas, best performed during spring repotting. Carefully remove the plant from its container and gently separate the root ball into sections, ensuring each division contains healthy roots and several stems with foliage. Use clean, sharp tools to minimise tissue damage and disease transmission. Plant each division in fresh, well-draining potting mix formulated for tropical plants.
Post-division care requirements
Newly divided calatheas require extra attention during establishment. Maintain slightly higher humidity around divisions by covering them loosely with clear plastic bags or placing them in naturally humid locations like bathrooms. Keep soil consistently moist without waterlogging, and avoid fertilising for at least six weeks whilst roots establish. Expect some leaf loss as the plant adjusts to division stress, but new growth should emerge within several weeks under proper conditions.
When to avoid propagation
Refrain from dividing calatheas during autumn and winter when growth slows naturally. Similarly, avoid propagating stressed or unhealthy plants, as division further taxes their resources. Only propagate vigorous, well-established specimens that have outgrown their containers or developed multiple distinct crowns suitable for separation.
Successfully cultivating calatheas requires understanding their tropical origins and replicating those conditions within your home. By selecting appropriate locations such as humid bathrooms or kitchens with indirect light, maintaining consistent moisture and humidity levels, and providing attentive daily care, these stunning plants reward you with vibrant, patterned foliage. Whether you position your calathea near a north-facing window, in a steamy bathroom, or within your kitchen’s naturally humid environment, attention to their specific requirements transforms them from challenging specimens into thriving centrepieces that bring tropical elegance to any interior space.